Google Tag Manager Integration
Integrating Serenity Chat into your website using Google Tag Manager (GTM) is straightforward and allows you to add the chat component without modifying your website's code directly. This guide will walk you through the simple steps to set up GTM if it's not already installed, and then show you how to add and configure the Serenity Chat custom tag.
Step 1: Add Google Tag Manager to Your Website
Before adding the Serenity Chat tag, you need to ensure GTM is installed on your website. Here’s a quick setup guide if you haven’t done this yet:
-
Create a GTM Account:
- Visit the Google Tag Manager website and sign in.
- Create a new GTM account by providing your account name and container details.
-
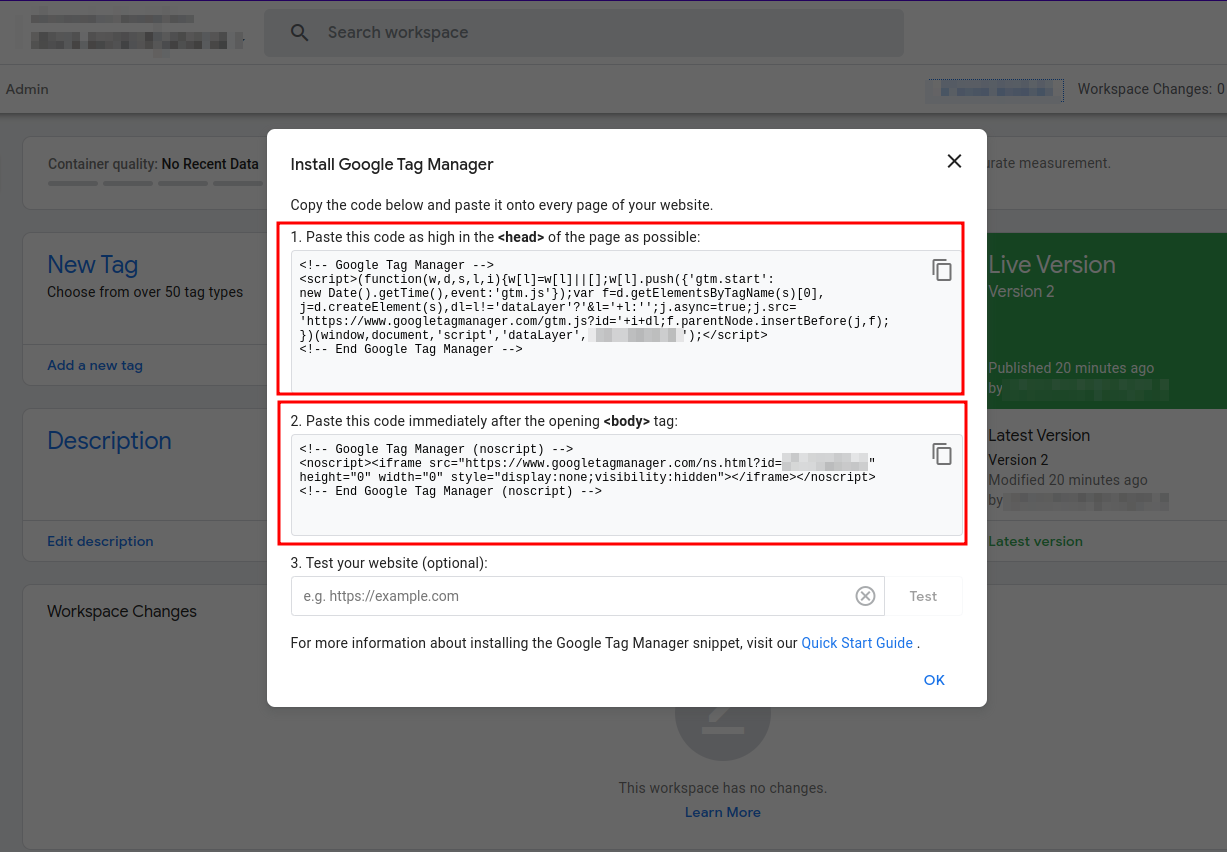
Get the GTM Script Snippet:
- After setting up your container, GTM will provide you with a JavaScript snippet.
- You’ll need to paste this into your website: one part goes in the
<head>section, and the other immediately after the opening<body>tag.
-
Install the Snippet on Your Website:
-
Add the GTM snippet to the appropriate sections of your website’s HTML, ensuring it's included on all the pages where you want to use GTM.
-
Once the GTM code is in place, you’re ready to start adding tags.
Step 2: Add the Serenity Chat Custom Tag
Now that GTM is installed, you can add the Serenity Chat tag to integrate the chat tool into your site. Follow these steps to configure it:
-
Open Your GTM Workspace:
- In Google Tag Manager, open the Workspace you want to use.
-
Create a New Tag:
- Go to the Tags section and click on New to create a new tag.

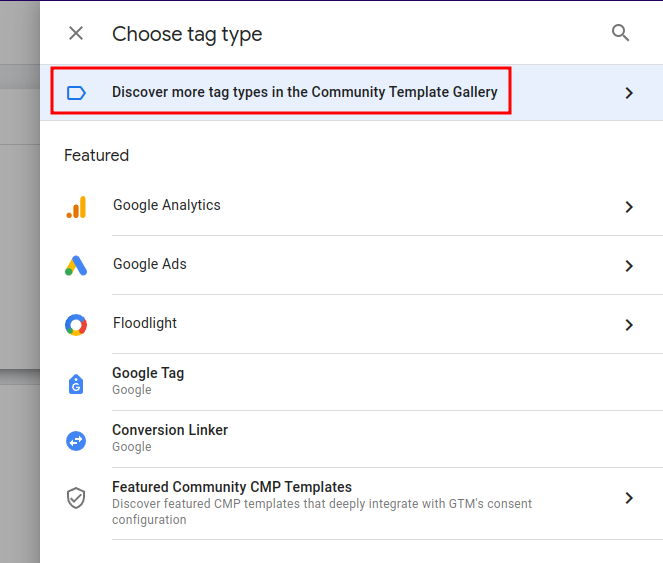
- In the Tag Configuration box, click to open the Choose Tag Type panel.
- Go to the Tags section and click on New to create a new tag.
-
Discover the Serenity Chat Template:
-
In the panel, click on the option Discover more tag types in the Community Template Gallery.
-
This will open the Community Template Gallery. Use the search bar to filter for "Serenity Chat".

-
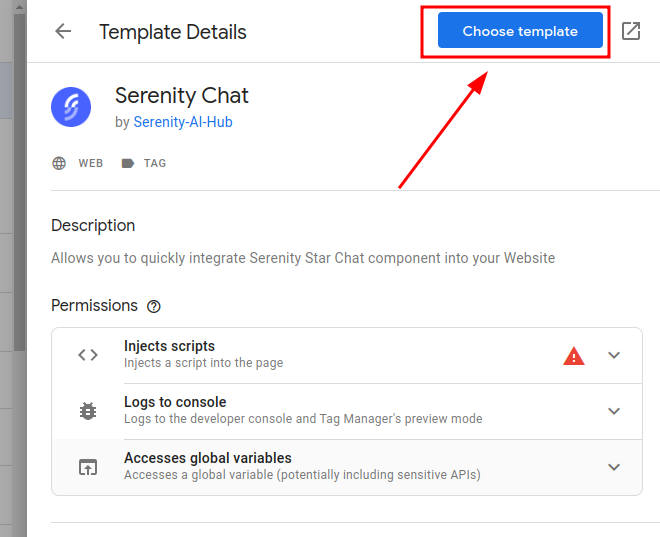
Once you find the Serenity Chat tag, click on Choose Template.
-
-
Configure the Serenity Chat Tag:
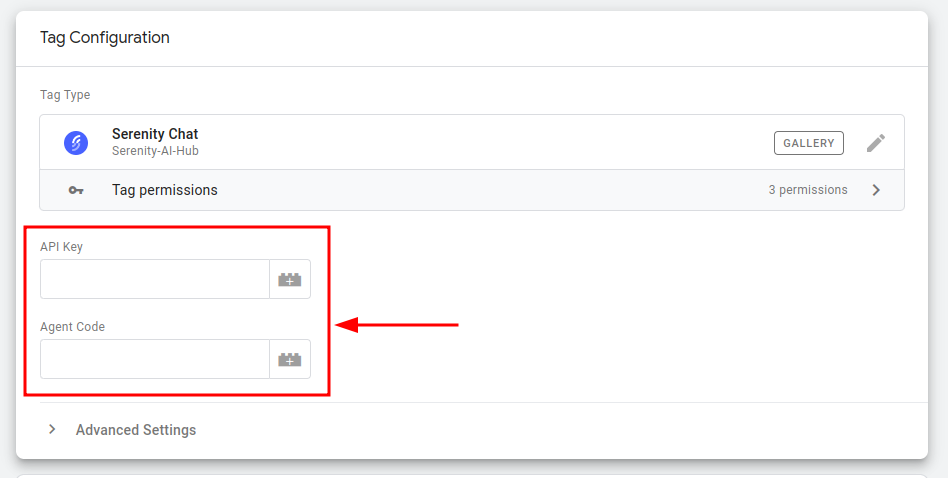
- After selecting the template, you’ll see the configuration fields.
- Enter your API Key and agentCode in the required fields.
-
Set Up a Trigger:
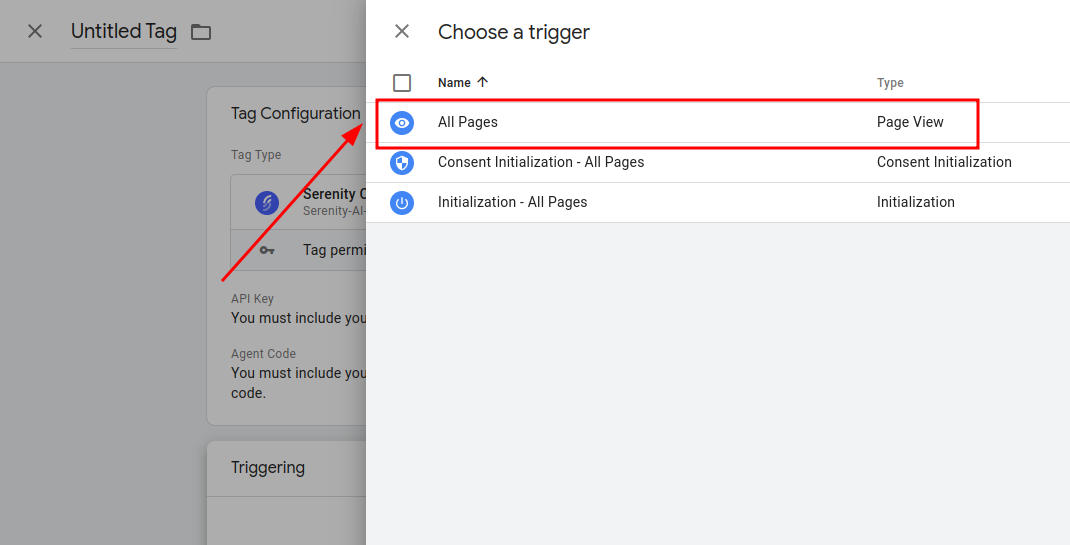
- Scroll down to the Triggering section and click Triggering.
- For most users, it’s recommended to select Page View and apply it to All Pages. This ensures that the chat will appear on every page of your site.
-
Save the Tag:
- After configuring the tag and trigger, give your tag a descriptive name (e.g., "Serenity Chat Tag") and click Save.
Step 3: Publish Your Changes
After you’ve configured and saved the Serenity Chat tag, you need to publish your changes for them to take effect:
-
Preview Your Changes:
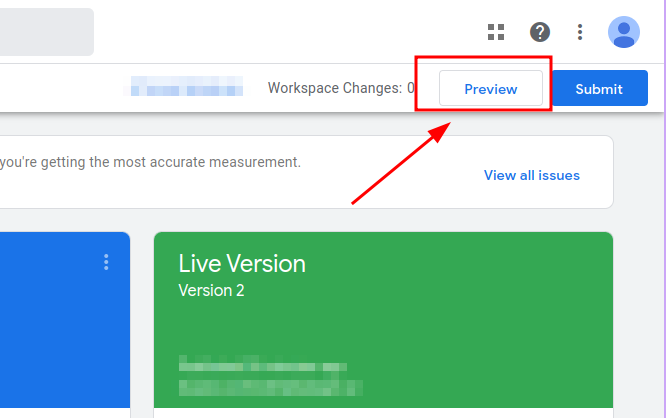
- Before publishing, click Preview in GTM to test the tag. This will open a debug mode where you can verify that the Serenity Chat widget is working as expected on your site.
- Before publishing, click Preview in GTM to test the tag. This will open a debug mode where you can verify that the Serenity Chat widget is working as expected on your site.
-
Submit and Publish:
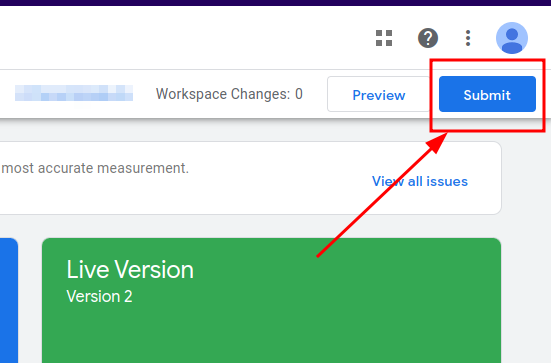
- Once you’ve confirmed that everything works, click the Submit button.
- Add a description of your changes (e.g., "Added Serenity Chat tag").
- Finally, click Publish to push the changes live to your website.
- Once you’ve confirmed that everything works, click the Submit button.
Conclusion
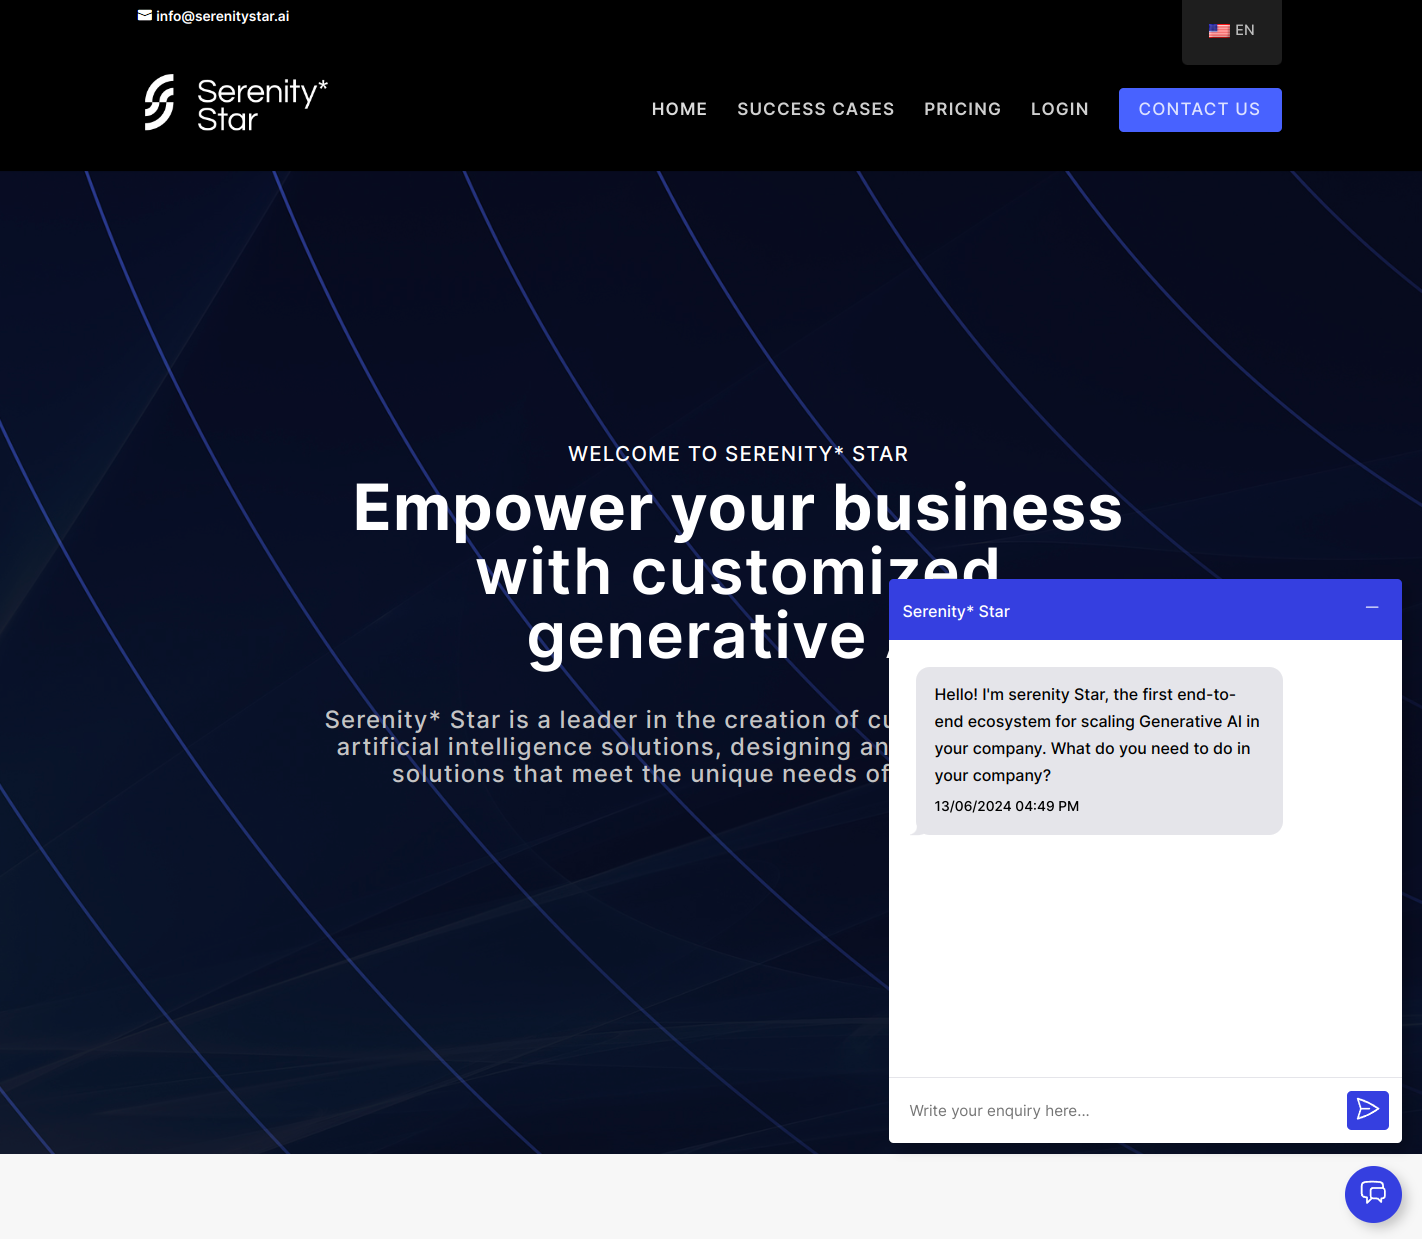
By following these steps, you can easily integrate Serenity Chat into your website using Google Tag Manager. This allows you to deploy the chat functionality quickly and manage it through GTM without editing your site’s code directly. Once live, your chat widget will be available for users to interact with.
For any issues or additional customizations, be sure to consult the GTM or Serenity Chat documentation.


