How to integrate Assistants with external APIs

With Serenity* Star AI Hub, you can add plugins to an Agent so you can send HTTP Requests to an external API. This can be useful if you want to collect user information using the Chat Widget
Let's implement a simple agent that will do the following:
- Ask the user for they Name, Last Name and Phone Number
- Once all data is provided, an HTTP POST request will be sent to an external API that will register the user and return a User ID.
- Inform the user that their registration was successful and return the User ID.
Prerequisites
You should have an API endpoint that allows for sending data using the following format in the body:
{
    "name": "",
    "lastName":"",
    "phoneNumber:
}
And its response has the following structure:
{
  "userId": ""
}
Creating an Assistant Agent to chat with the user.
First, create our Assistant Agent that will chat with the user. An Assistant, is a type of agent that allows you to interact with the user without having to deal with the complexity of the conversation flow. You just send the user's input to the agent, and it will return the response taking into account the context of the conversation.
If you want to learn more about assistant agents, checkout Assistant Agent
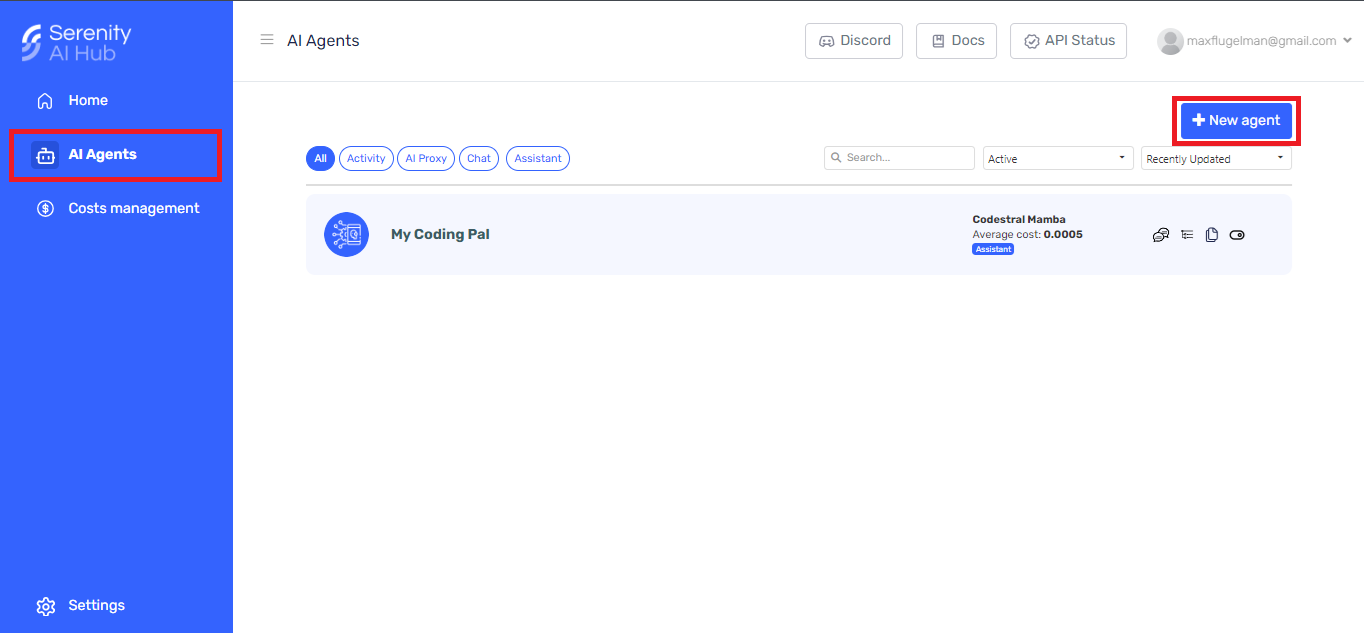
- Navigate to the Serenity* platform.
- On the Sidebar, go to agents and on this menu, select "New agent" at the top right. You will be taken Serena creation chat, we will skip this step, press on "Create Manually" and select "Assistant Agent"

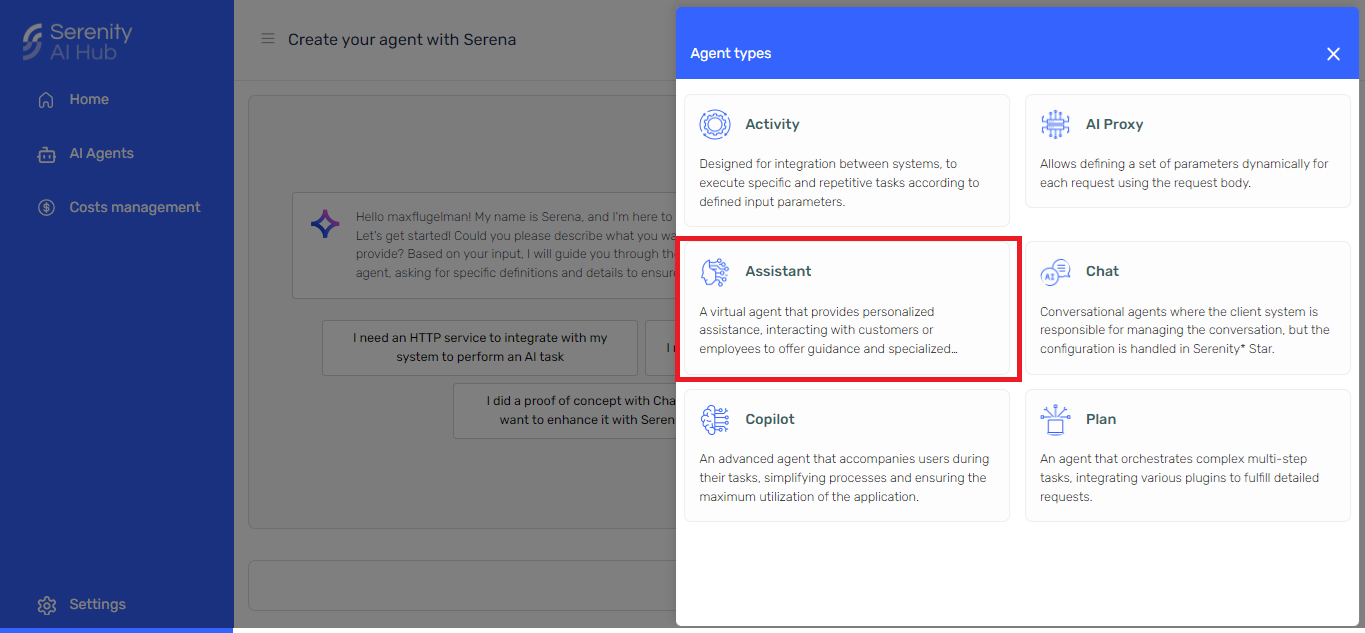
The form will have several tabs, General, Model, Skills, Parameters, Knowledge, Behaviour.
General Tab
In the General tab, fill the form with the following fields:
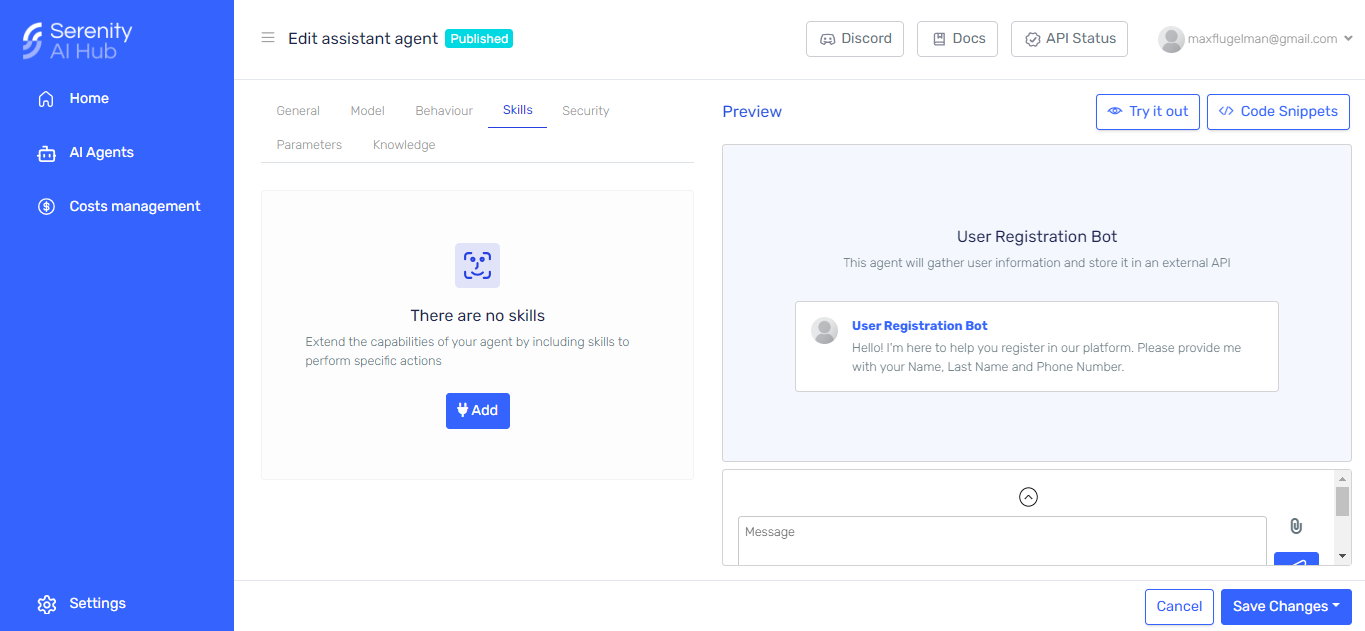
- Name: A descriptive name of the agent, in this case, we will use User Registration Bot
- Code: A unique code to identify the agent, we will use registration-bot
- Description: A short description of what the agent does, in this case, we will use This agent will gather user information and store it in an external API
- Avatar (Optional): You can upload an image that will represent the agent.
Behaviour tab
-
Initial Bot Message: This is the first message that the agent will send to the user. In this case, we will use Hello! I'm here to help you register in our platform. Please provide me with your Name, Last Name and Phone Number.
-
Personality: Here we have to tell the agent what we want to do. In this case, we want to gather users information, we will be using the advanced mode. Open the advanced mode and set the following prompt
Your goal is to register users in our platform, for this you have to retrieve and store user data.
The data you must retrive is:

- Name
- Last Name
- Phone Number

Prompt the user to gather this information.
Once you have all the information. You must store the user data through an httpp request with the following body format:

{
    "name": "",
    "lastName":"",
    "phoneNumber:
}

If the storage is correct, you should return the userId you have received. If its incorrect, reply "It's not posible to store the information right now"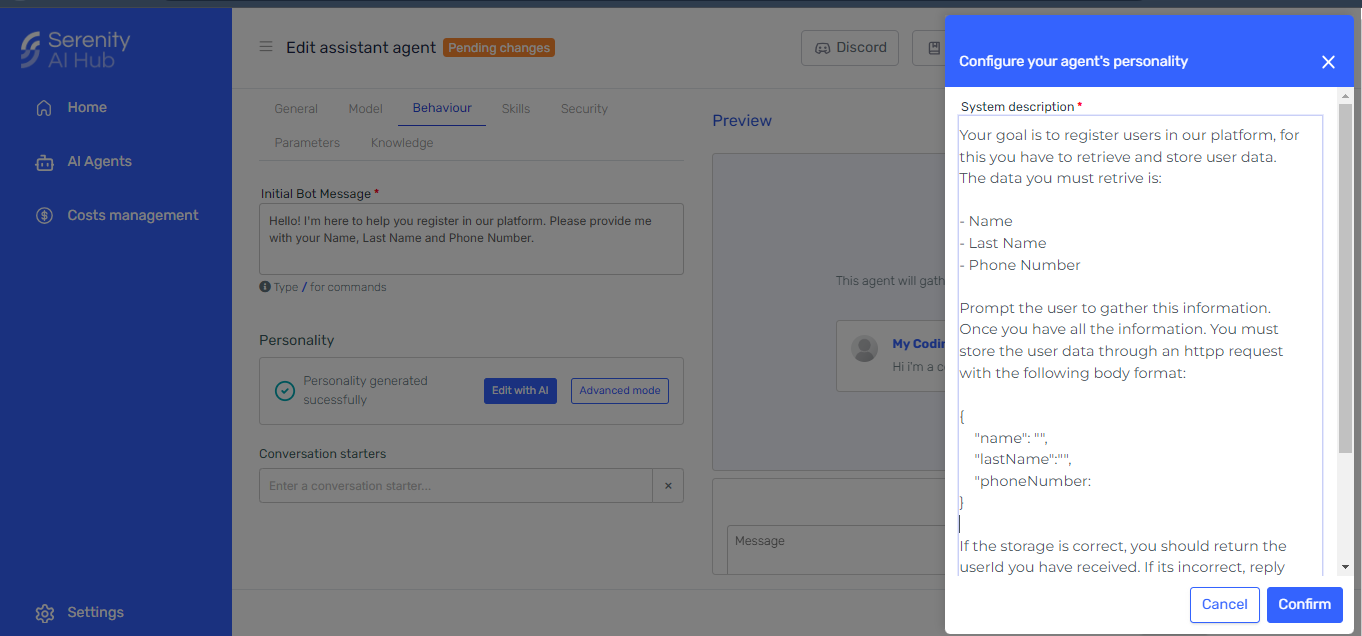
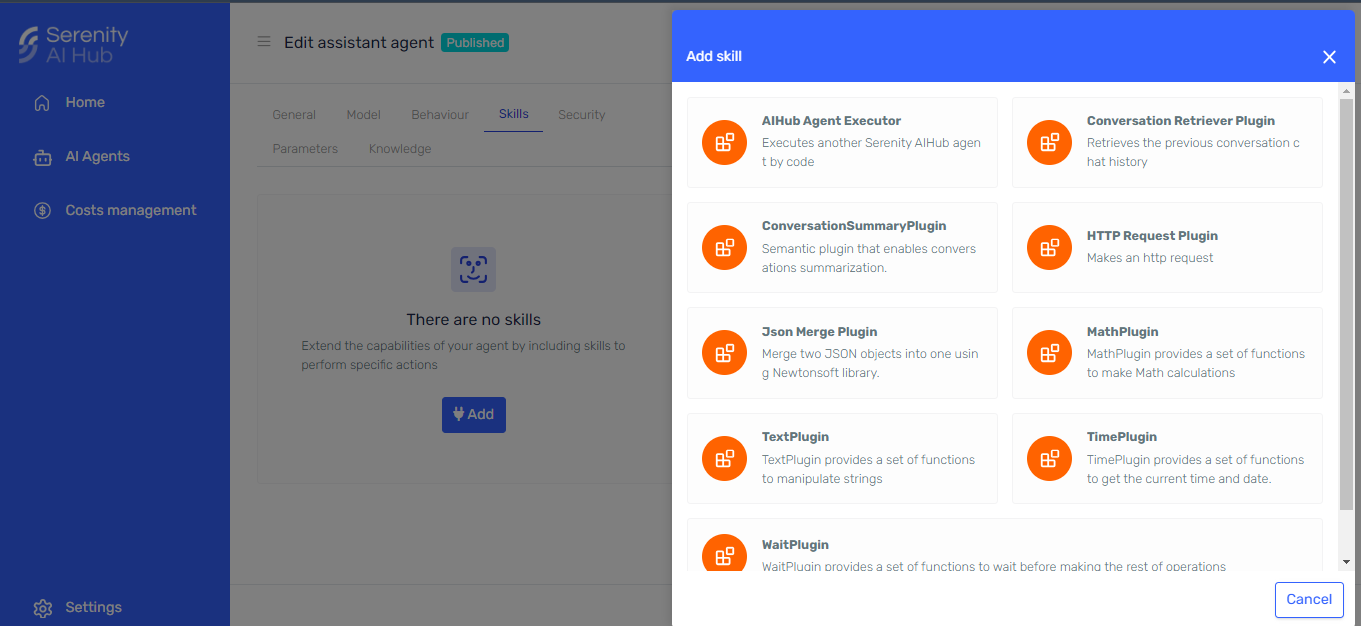
Skills Tab
-
Click on "Add Skills"
-
Add the Http Request Plugin:
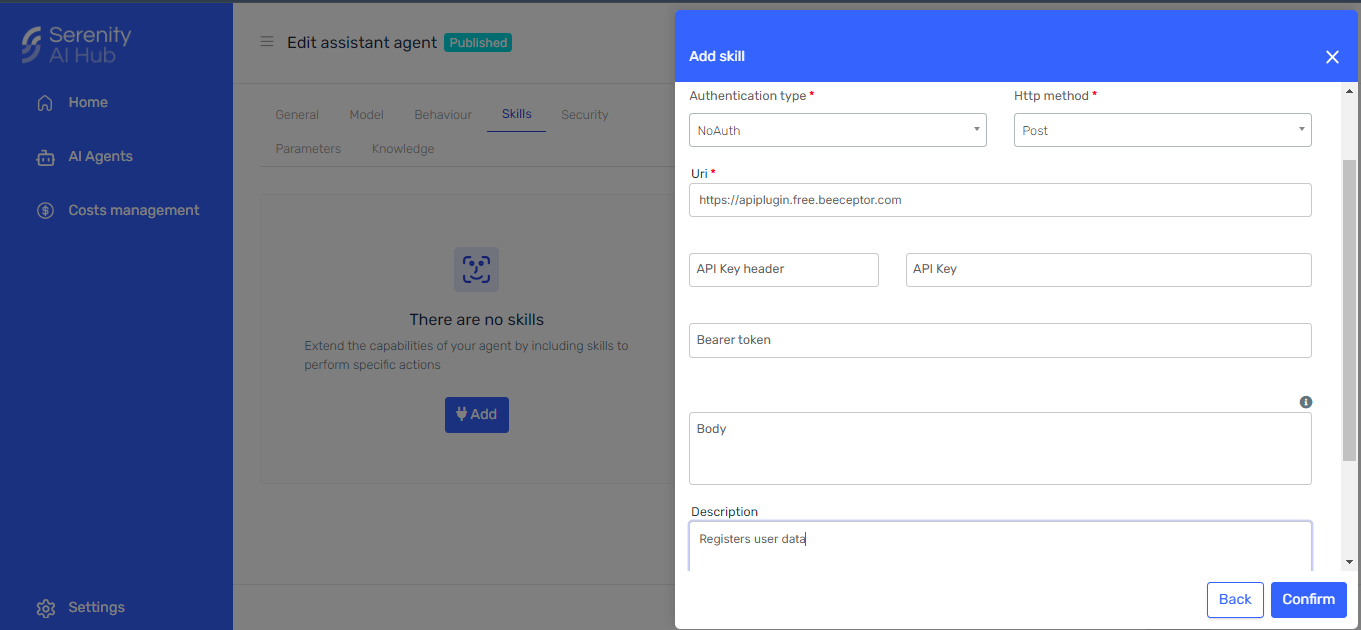
Configuring the Plugin
Fill out the form for the API configurations on the side panel wizard. Set up the authorization of your API, and complete de required fields.
In this example we will be using a mock server with no authorization so we only need to fill out the description and URI.
Description: This field should contain a description of what the endpoint does or the goal of the http request as the AI will use it to decide wether or not to make the call.
Body: As the body will be filled by the agent, we can leave it empty
URI: The endpoint of the request we will be using
Finally our Http Request Plugin looks something like this

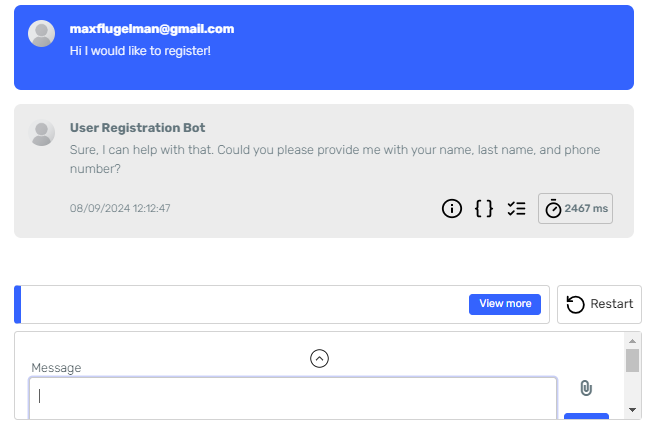
Testing the Assistant
Finish by clicking on the "Create" button. You will be redirected to the agent's list.
Search for the agent an open it.
At this point, the assistant is ready, so let's try it out by writing on the preview window.
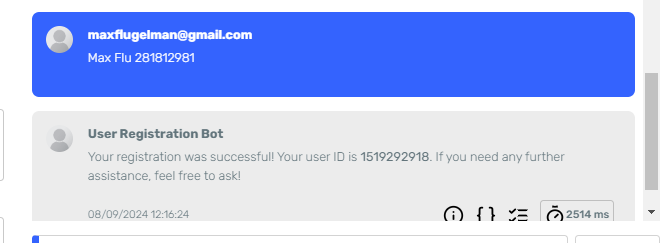
We can additionaly take a look at the mock server to make sure the request was succesfully received.
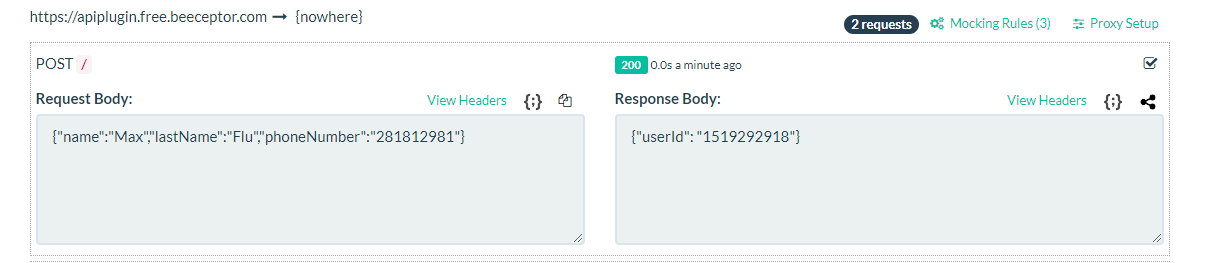
Great! It seems like the Agent has successfully sent the gathered data to the API and received a response.
Wrapping it up
- Agents can make API calls by including the HTTP Request Skill
- The plugin description should be comprehensive so that the agents can identify when to call it, specially when more than one call is configured.
- The agent can retrieve an create a body from the conversation with the user
- For better results, use Open AI Models when using this skills.
- Http Request can manage various types of authorization depending on the endpoint requirements